

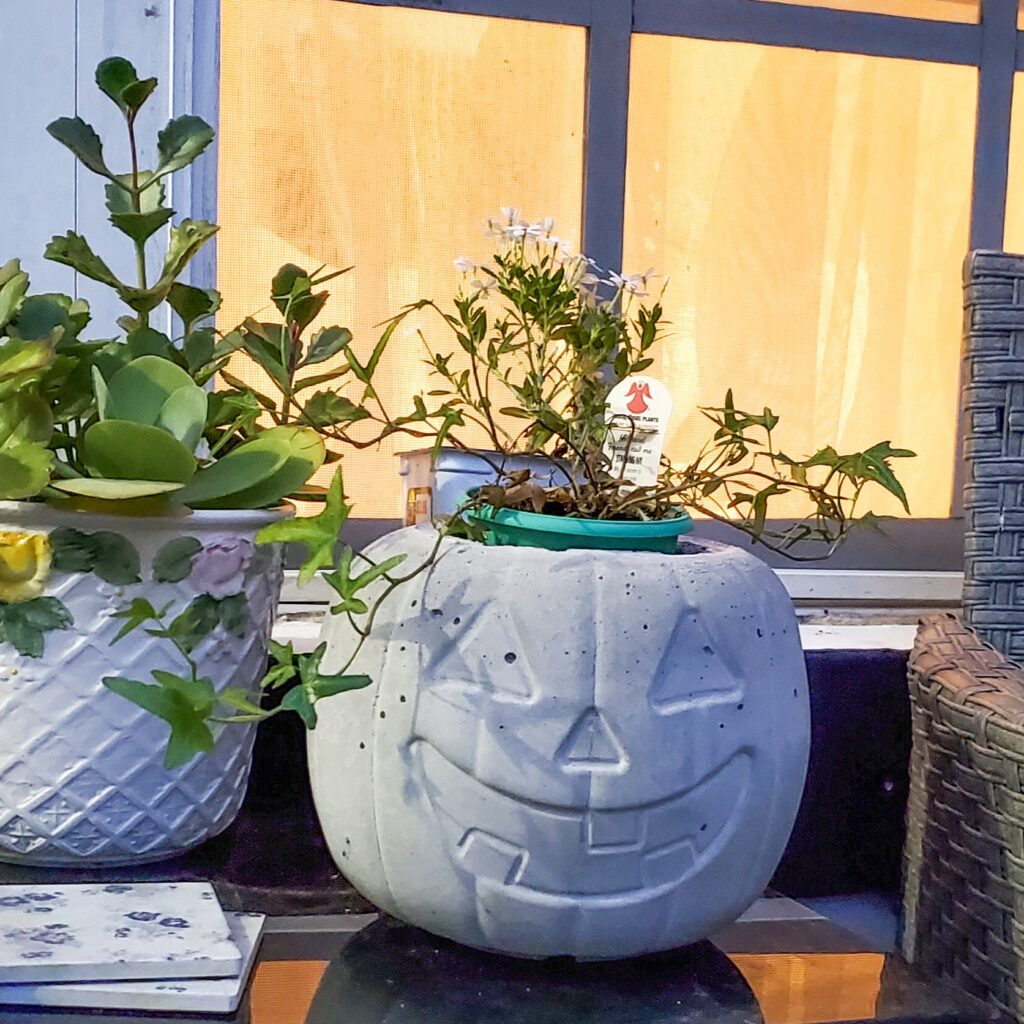
How to DIY Concrete Jack O Lantern

This Fall and Halloween Season will be all about the tricks instead of the treats! Ok maybe some treats, no trick or treating for us though. Instead I’ll be hosting a spooky soiree for Halloween due to circumstances. Let’s not get off track, this blog is about these adorable DIY Concrete Jack-O-Lanterns.
I was searching Pinterest (follow me over there) for easy DIY pumpkin projects. So many cute DIY concrete pumpkins kept popping up, so I decided it to try these.
I’m so glad I did because they turned out fabulous. The best part about these Jack O Lanterns / Pumpkins is that I can continue using them through out Thanksgiving. I’ll just turn them around to hide their goofy face’s (wink)
Here is how we did it!
Lets Begin!
DIY Jack O Lantern Supplies List
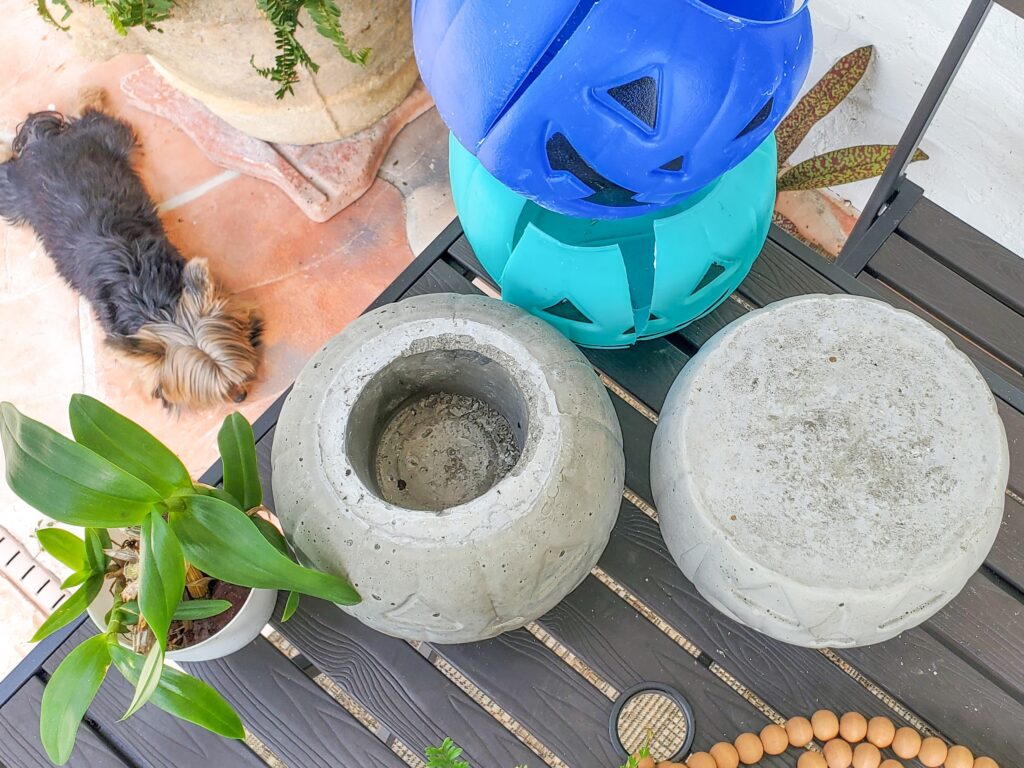
- Quikrete 5000 (HomeDepot $4.44)
- Plastic Candy Jack O Lantern (Walmart $1.24)
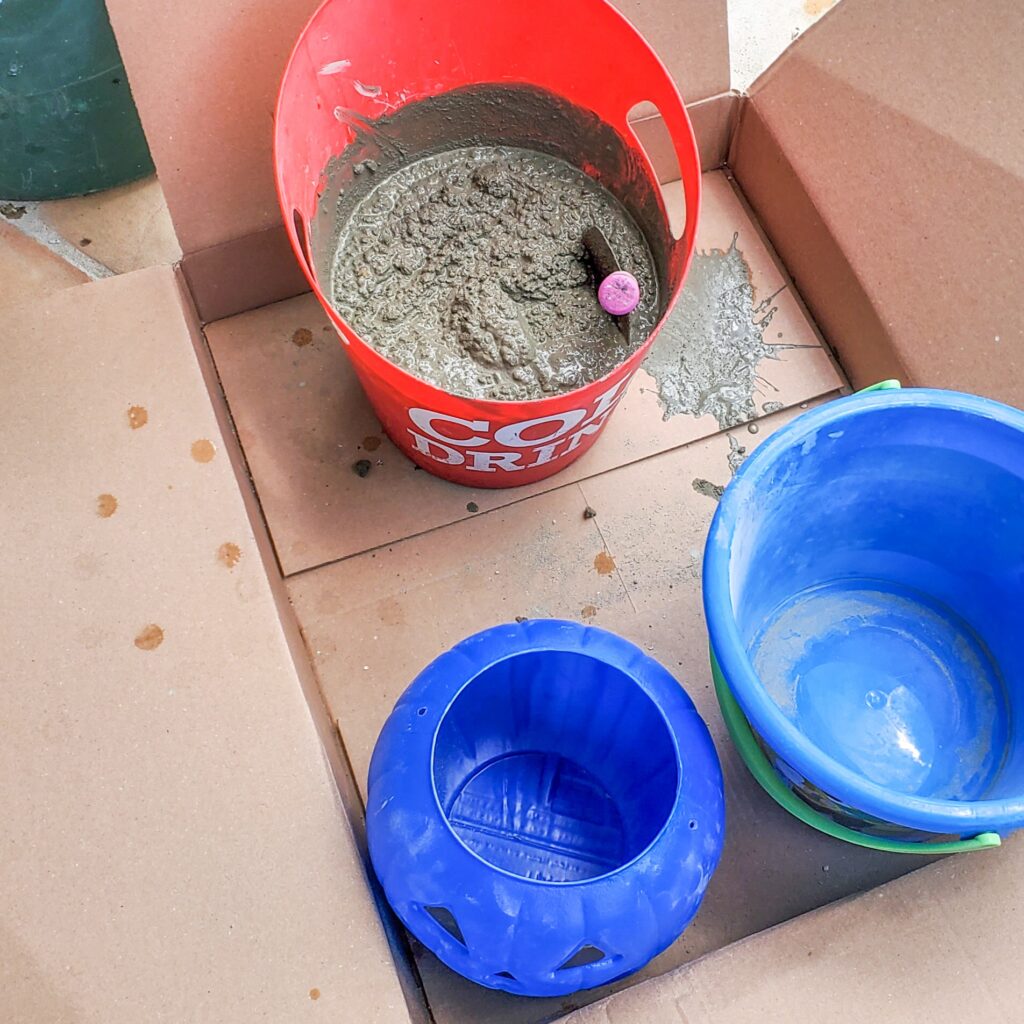
- Bucket for mixing
- Water (according to cement directions)
- Hand trowel or something for mixing cement and water
- Utility knife or box cutter
- Small bucket or cup ( if you want to use the pumpkin as a planter )
- Joint pliers
- Disposable gloves
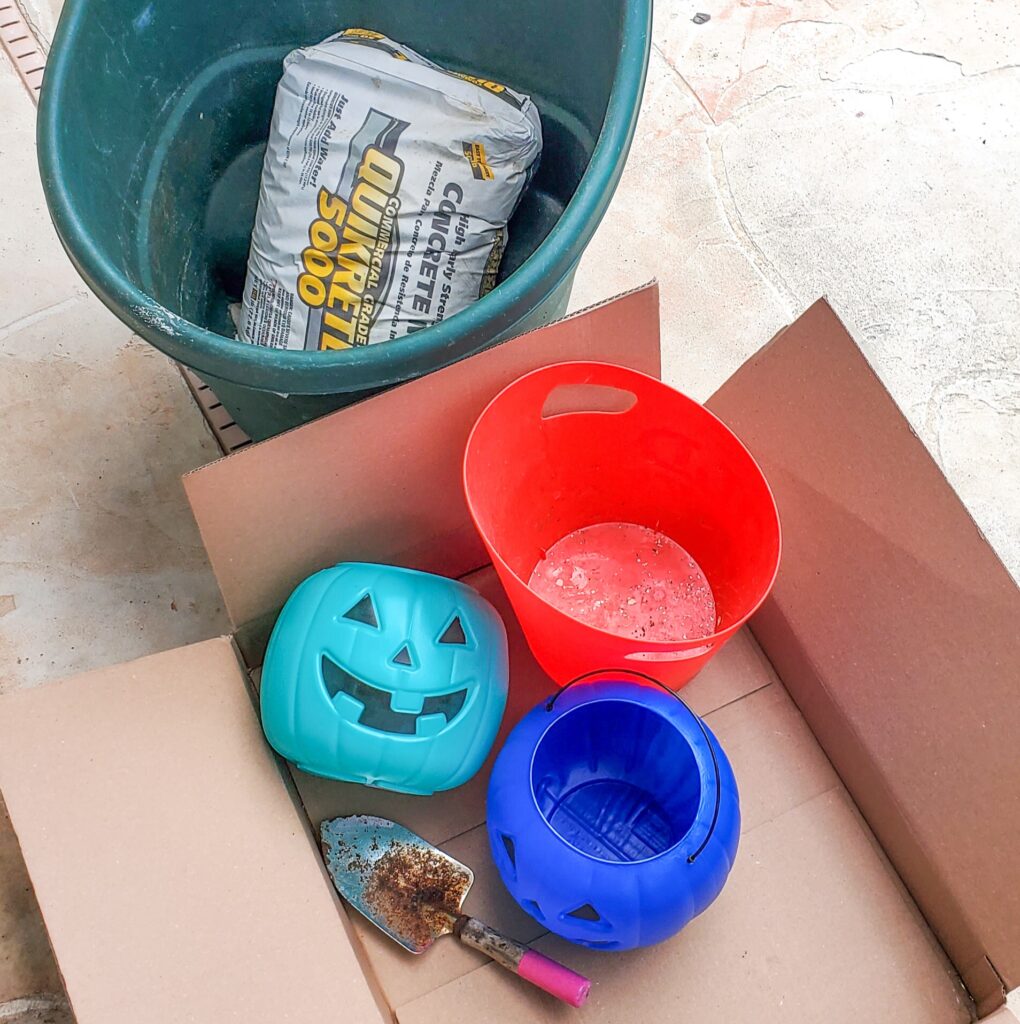

- Prep area and gather materials
- Cut off the handle from the pumpkin pail
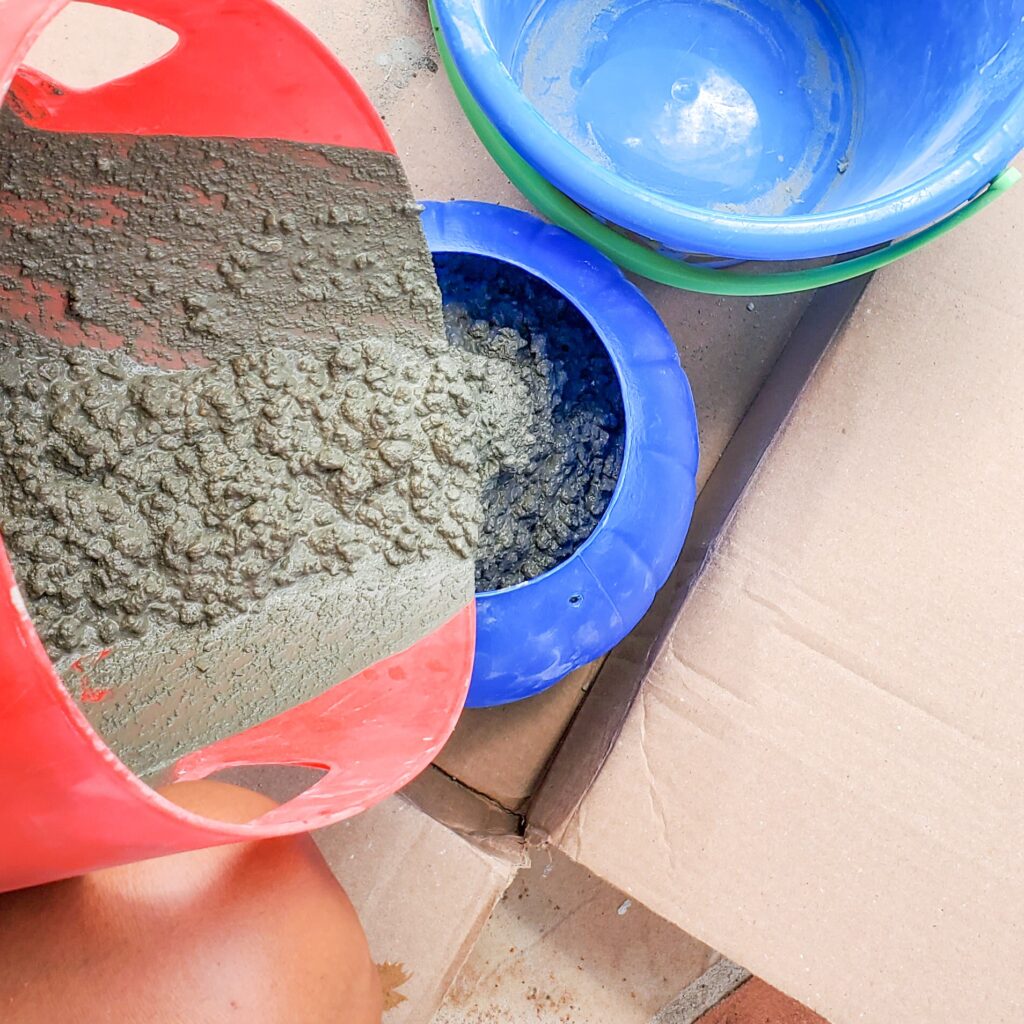
- Mix concrete in the bucket ( follow mixing directions )
- Mix thoroughly and quickly I used a hand trowel.
- Pour the wet concrete mix into the plastic Jack O Lantern
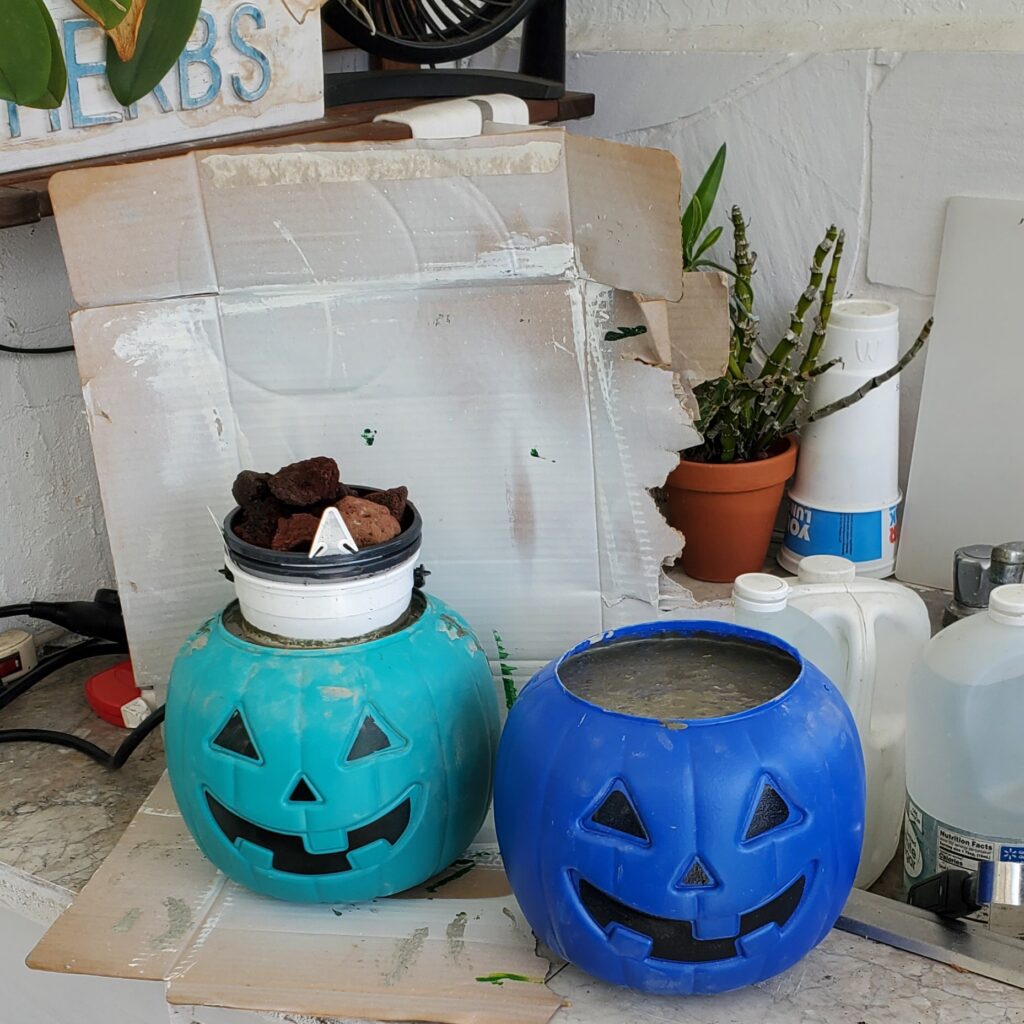
- Fill it to the top if you are using it as a stand
- Fill it just above the eyes if you are using it as a planter
- Insert disposable small bucket or cup into the center of the wet concrete mix
- Push the container down until the concrete mix is leveled with the top of the Jack O Lantern
- Place an object on top or inside the small bucket, I used rocks to weight down the container
- Work the air bubbles out of the concrete by carefully taping the filled Jack O Lanterns on all sides ( the longer you tap the less air bubbles you’ll end up with in the end )
- Set aside and allow concrete to set ( I let mine set for close to 24 hours )
- If using as a planter you can carefully drill a hole at the bottom after letting it set the 24 hours
- If you will be painting or staining your Jack O Lantern I suggest waiting 4 to 5 days to give the cement time to cure thoroughly
Next Day
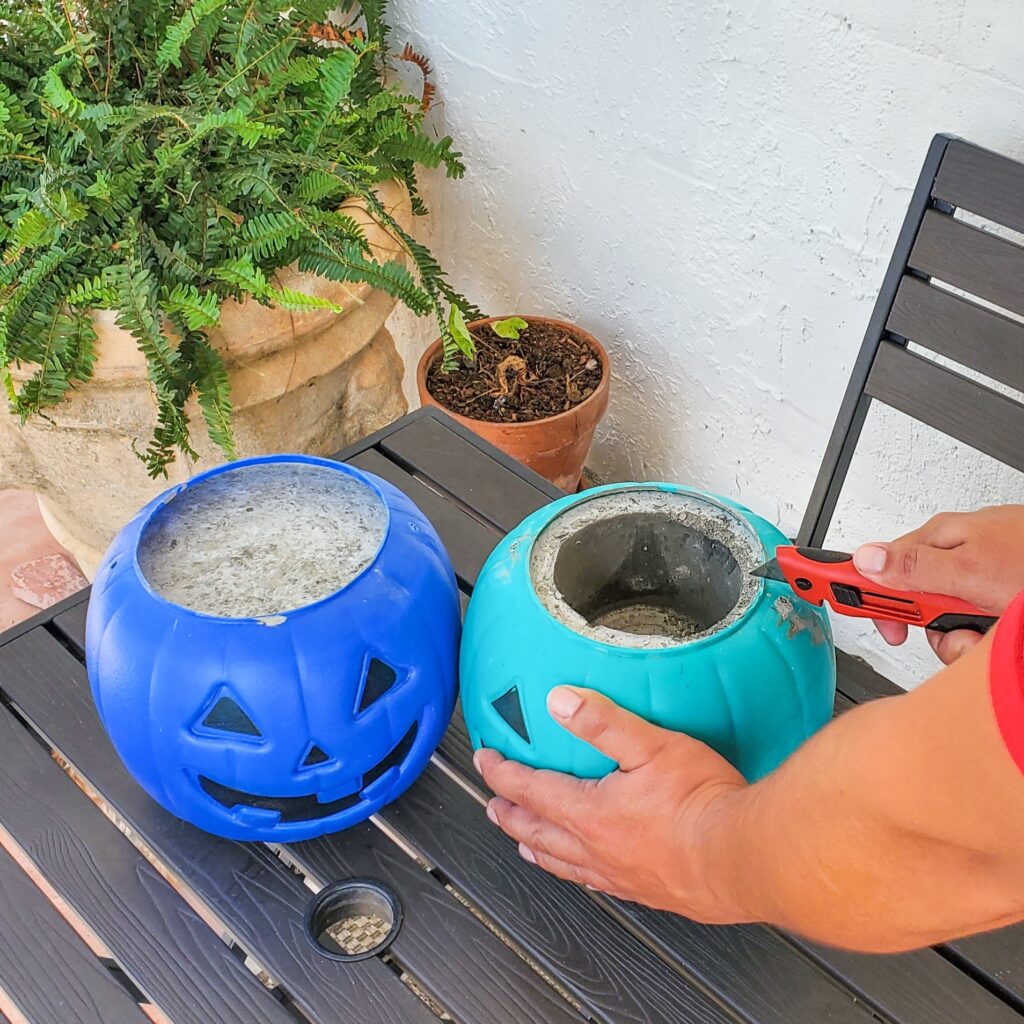
- Cut and remove the plastic Jack O Lantern using a utility knife or box cutter.
- After making the slits on the plastic Jack O Lantern I found it much easier to remove the plastic with the joint pliers instead of my hands
- If you made a planter you can remove the plastic container ( HINT: I removed the container as soon as the concrete hardened, it took 6 to 7 hours for mine to harden. I found it much easier to remove at this time. I allowed the rest of the concrete to sit in the Jack O Lantern till the next day.
- Allow the pumpkins to completely dry out another day or two before adding a plant or decorations.
Voila!
Enjoy Your Goofy Concrete Jack O Lantern.

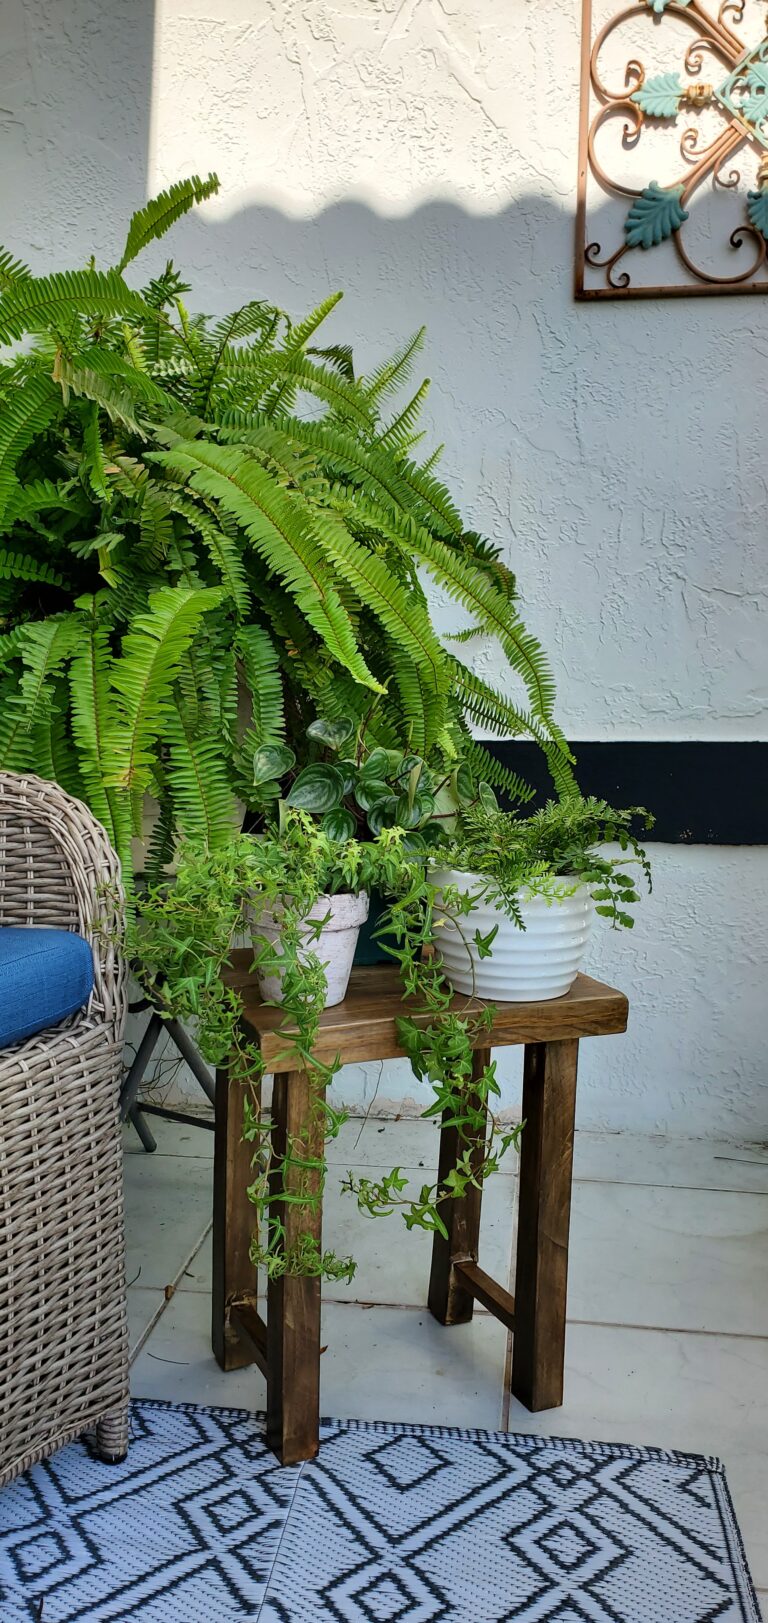
Next DIY Blog will be on how I made this wooden riser. Stay Tuned!

Look at How Cute They Turned Out!

This was such a simple and affordable project! Let me know if you do it, I would love to see your creativity.